I recently built a home bar for my ongoing pub shed project. Which worked out well, with that done it is time to build the seating for my pub shed. But is it hard to build seating for a home bar? And how much will it cost?
I decided to build a corner bench seat with storage, well that is what is in my head. It is just a matter of transferring the picture in my head to a real life object, namely seating. In this post I will walk you through how I built my seating.
Is It Hard To Build Seating For A Home Bar?
It is not difficult to build seating for a home bar. In fact it is pretty straightforward and requires little skill and just a few tools to complete the job. Plus some materials and fixings and finally some type of upholstery to finish. It is definitely a DIY job that requires basic woodworking skills.
My seating took about four hours up to the point of upholstery, which I have yet to decide on.
Plan Your Home Bar Seating
The first step to any project is to plan what you intend to build. Sketch on paper what you want your seating to look like. What material you are going to use and how much of it you will need.
Work out the measurements and what fixings you will need. It is important to plan your project.
However just like the bar I built recently, I didn’t sketch anything on paper. But I did have a picture in my head and some pieces of wood I thought might be suitable to build the seating frame.
What I did do though was to measure the height, depth and back of a chair to get the right size for my seating. I also copied the angle of the back to make it more comfortable.
My son Joe was visiting so he gave me a hand with the framework. Joe also took some pictures along the way, which I again forgot.
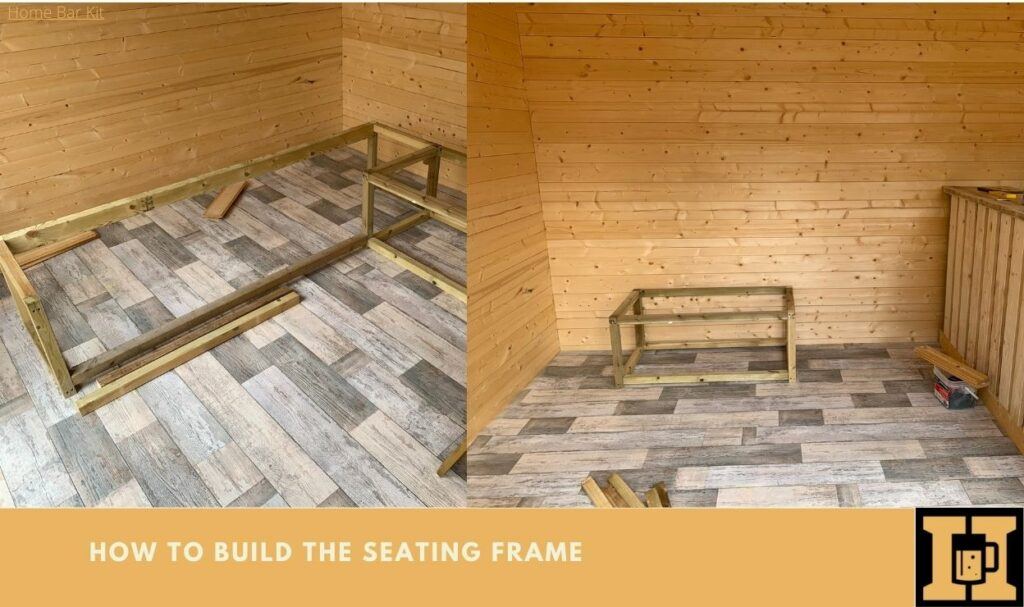
How To Build The Seating Frame

In my head I have a corner bench seat that is a three seater on one side and a two seater on the other. To fit snug into one corner of my pub shed.
I have several lengths of smooth planned 1.6×1.6 inch (40x40mm) timber at lengths of 35 inches (90cm). The idea in my head was to create two boxed frames and join them together to create the L shape bench.
I made the two seater box first. Four full lengths of timber are for the length. The four cut to create the right height and four cut to the right depth size.
These are all screwed together using predrilled holes and 2.5 inch (65mm) screws. This created a rectangle frame which measures 39 inches (1 metre) in length, 19.5 inches (50cm) depth and 16 inches (41cm) in height.
I repeat the process for the second box which is longer in length. Once all fixed together the second rectangle frame measure 79 inches (2 metres) in length. The depth and height are the same as the smaller frame.
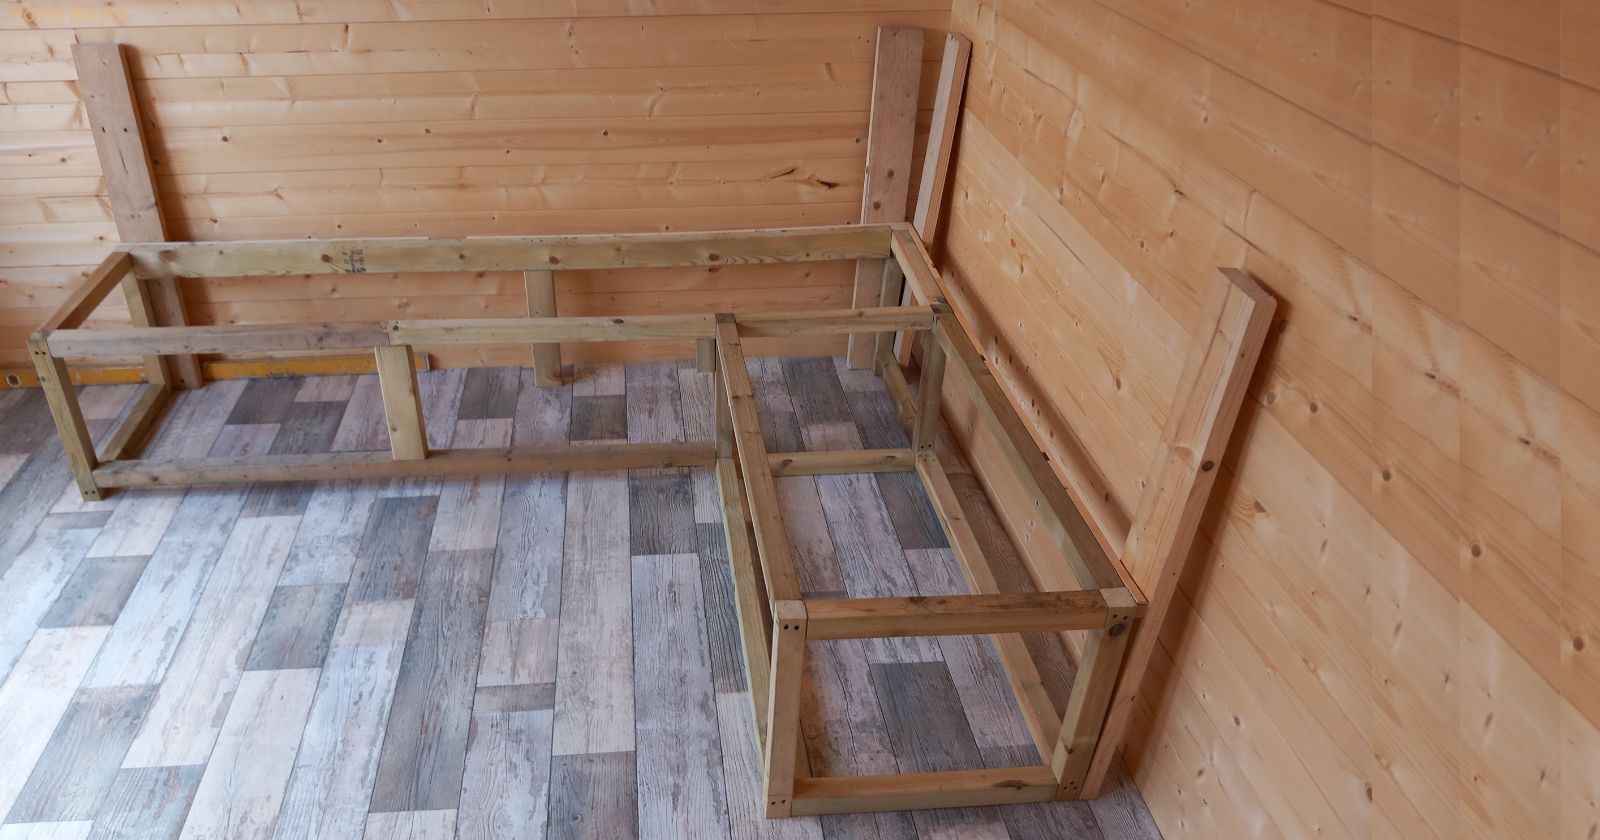
These are fixed together using screws to create the L shape bench. The finished frame measures 79 inches (2 metres) x 59 inches ( 1.5 metres) along the two lengths.
This creates a three seater and two seater L shape bench.
By fixing a batten along the top of both frames it gives the perfect angle for the back rest pillars. These are cut from a length of 4 inch (10cm) x 2 inch (5cm) wood.
These are fixed upright to the bottom and top of the frame using screws. The seating frame is now ready for cladding.
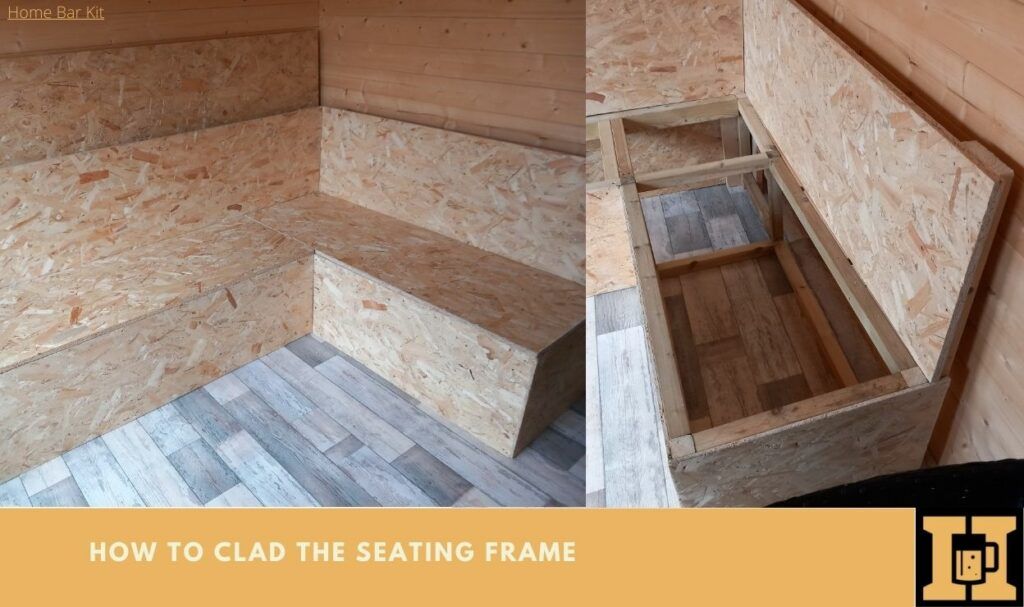
How To Clad The Seating Frame

Unfortunately I didn’t have any suitable wood to clad the seating frame, so I have to buy some.
There are a number of different materials you can use for cladding the frame. Plywood, MDF or OSB to name a few. I chose to go with OSB (Oriented Strand Board) because it works out the cheapest and is strong.
The front of the seating frame will be clad with 0.4 inch (9mm) thick OSB. While the backrest and the tops will be clad with 0.8 inch (18mm) thick OSB for strength.
I cut each front piece of OSB to fit each separate panel and fixed them using 1.5 inch (40mm) screws in several places along each panel.
The two backrests are cut to size and fixed to the upright pillars using the same screws. Finally the two seat bases are cut to size but not fixed.
I am going to add hinges to these so they become lids and base of the seating becomes storage. The front and sides of the base will be painter or varnished.
The bench seat is now ready for upholstery.
Upholstery Or Cushions
I am not sure at this stage whether I will upholster the seating bench, or buy some cushions to fit on the base and backrest.
I am yet to price it up to see which will be more economical, and which will look the best. At the moment I am leaning towards buying the foam and material and making the upholstery myself.
Update: The Best Upholstery For My Pub Shed Bench Seat
How Much Does It Cost To Build A Bench Seat?
This will depend on the material you use as different materials are different prices. The framework for my seating is made from wood that I already had leftover from another project.
So that part didn’t cost any money. However as I did not have any wood suitable for the cladding, I had to buy some.
I used two sheets of 18mm OSB and one sheet of 9mm OSB. The sheets are 2.44m x 1.22m which is 8ft x 4ft. The cost including taxes and delivery came out at just over £100.
I will have the expense of the upholstery on top of that, as well as paint or varnish. However up to this point the cost to build my bench seat is just over £100.
Final Thoughts
So it is fairly easy to build a bench seat for a home bar or pub shed. I just kept it simple, a simple frame and simple cladding.
The backrest can be angled to suit your own needs. I just took the angle from a chair that is comfortable and used a batten to create this angle.
It is a good idea to plan your seating first using drawings and listing materials and fixings. However you can just go for it and make from a picture in your head as I did.
To get the right sizing specification work from the measurements of a chair you find comfortable. Height of the seat, depth of the seat and height and angle of the backrest.
I used simple tools to build my seating. A pencil, tape measure, spirit level, screwdriver, and hand saw for the frame. I added a jigsaw to make short work of cutting the panels.
Like I said it is straightforward to build bench seating, so it is worth having a go yourself. Just keep it simple and follow the steps I took.
If you have any questions or have any tips yourself, then do share your thoughts below.
Related: Why Your Home Bar Needs A Bench Seat
Rob is a passionate home bar and pub shed enthusiast with a passion for craft beer. With hands-on experience in designing and building his own home bar, Rob shares his knowledge, tips, and inspiration to help fellow enthusiasts create their own perfect space. Alongside the world of home bars and pub sheds, Rob also explores the diverse and exciting realm of craft beer, providing honest reviews to help you discover your next favorite brew. Join Rob on a journey of flavor, design, and craftsmanship right here on Home Bar Kit.

